Script to Show a QLabel in a Window
1
2
3
4
5
6
7
8
9
10
11
12
13
14
15
16
17
18
19
20
21
22
23
24
25
26
27
28
29
30
31
32
33
34
35
36
37
38
39
40
41
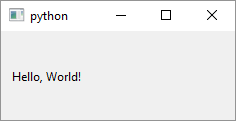
# Displays a Hello, World! message in QLabel
# Import QLabel and QVBoxLayout
import sys
from PySide6.QtWidgets import (QApplication,
QWidget, QLabel, QVBoxLayout)
# 1 - Create a class that inherits from QWidget
class Window(QWidget):
def __init__(self):
super().__init__()
# 2 - Set window layout
layout = QVBoxLayout()
self.setLayout(layout)
# 3 - Create a QLabel instance
# and add it to the window layout
label = QLabel('Hello, World!')
layout.addWidget(label)
# The boilerplate code is similar to that from helloworld.py
if __name__ == '__main__':
# The qApp variable points to the application
# if it was already created so this is equivalent
# to checking for QApplication.instance()
app = qApp or QApplication(sys.argv)
main_window = Window()
main_window.show()
sys.exit(app.exec())
In the previous example I described a simple PySide6 scripts that shows an empty window on the screen. Now let’s start adding widgets to that window.
-
Create a class inherited from
QWidget. This class is used as the application main window. In the class’__init__()method -
Create a
QVBoxLayoutinstance and set it as the window layout.QVBoxLayoutlays out its child widgets vertically. There’s alsoQHBoxLayout,QFormLayout,QGridLayoutandQStackedLayoutto choose from. You don’t actually have to use layouts - you can position widgets manually, but layouts are more flexible and, as far as I can tell, are commonly used in Qt/PySide6 applications. -
Create an instance (object) of the QLabel class and add it to the layout. QLabel is a widget that is used to display multi-line text that you can format but can not edit.
The rest of the code is the same as in the script that shows an empty window, except that we use qApp a variable available after importing PySide6 which is equivalent to QApplication.instance().