QPushButton
1
2
3
4
5
6
7
8
9
10
11
12
13
14
15
16
17
18
19
20
21
22
23
24
25
26
27
28
29
30
31
32
33
34
35
36
37
38
39
40
41
42
43
44
45
46
47
48
49
50
# QPushButton generates 'clicked' signals when you click it duh
from random import randint
import sys
from PySide6.QtCore import Qt
from PySide6.QtCore import Slot
from PySide6.QtWidgets import (QApplication,
QPushButton, QLabel, QWidget, QVBoxLayout)
class Window(QWidget):
def __init__(self):
super().__init__()
layout = QVBoxLayout()
self.setLayout(layout)
# 1 - Create the button and add it to the window layout
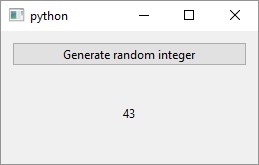
button = QPushButton('Generate random integer')
# 3 - Connect the button clicked event with the slot
button.clicked.connect(self.on_button_clicked)
self.label = QLabel()
self.label.setAlignment(Qt.AlignmentFlag.AlignCenter)
layout.addWidget(button)
layout.addWidget(self.label)
# 2 - Create the method/function to use as the slot
@Slot()
def on_button_clicked(self):
self.label.setText(str(randint(0, 100)))
if __name__ == '__main__':
app = QApplication(sys.argv)
main_window = Window()
main_window.show()
sys.exit(app.exec())
QPushButton is a simple widget and is a commonly used Gui element. It sends clicked, pressed, released and toggled signals. toggled is useful only if you set QPushButton.checkable property to True in which case you effectively turn it into a toggle button - if you press it it stays pressed until you press it again. To use QPushButton in your application
-
Create a
QPushButtonobject, setting the text to be displayed on the button. You don’t have to add text to a button. If you look atQPushButtondocumentation you’ll notice that theQPushButtonclass has three constructors (those with the same name as the class itself):-
The one that optionally accepts only the button’s parent. If you use it the button will initially be shown without any text
-
The one that, in addition to parent, accepts the text to be displayed on the button. This is the one we use in the example
-
The one that, in addition to parent and text, accepts an icon so you can add an image to a button
That a class has more than one constructor is a common case in Qt and in the OOP world in general. The Qt documentation is comprehensive and you can consult it to find the most suitable constructor for your use case.
-
-
Create the method to be used as the slot. This is the method that will be called when the button is clicked. In this case the method sets a
QLabel’s text to a random integer. Note that the label is created as an instance variable (by attaching it toself) so we can access it from the slot, and that we had to convert the generatedinttostrto display it in the label. -
Connect the button’s
clickedsignal with the slot. That’s just one line of code and you can call your slot anything you want (within reason). That’s about it - three easy steps.