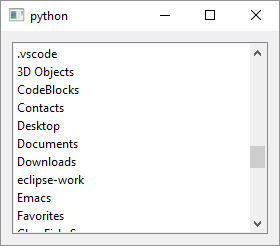
QListView

1
2
3
4
5
6
7
8
9
10
11
12
13
14
15
16
17
18
19
20
21
22
23
24
25
26
27
28
29
30
31
32
33
34
35
36
37
38
39
40
41
42
43
44
45
46
47
48
49
50
51
52
53
# QListView presents items stored in a model.
# ie. it uses the QT model/view architecture
# Models contain data and views display it
# so one model can be used with multiple views.
# It is similar to QListWidget but should be more flexible

import os
import sys

from PySide6.QtCore import QDir
from PySide6.QtGui import QStandardItemModel, QStandardItem
from PySide6.QtWidgets import (QApplication,
    QWidget, QVBoxLayout, QListView)


class Window(QWidget):

    def __init__(self):

        super().__init__()

        layout = QVBoxLayout()
        self.setLayout(layout)

        # 1 - Create the view

        list_view = QListView()

        # 2 - Create and populate the model

        self.model = QStandardItemModel()

        files = QDir.home().entryList()
        for f in files:
            item = QStandardItem(f)
            self.model.appendRow(item)

        # 3 - Connect the model and the view

        list_view.setModel(self.model)

        layout.addWidget(list_view)


if __name__ == '__main__':

    app = QApplication(sys.argv)

    main_window = Window()
    main_window.show()

    sys.exit(app.exec())
QListView is one of the Qt view classes. Visually, it looks exactly the same as QListWidget, its child class, but lacks methods for item manipulation like addItem() and similar. Instead, it makes you create a model to provide the data, which may be more work but is more flexible - for instance, one model can be associated with multiple views. To use QListView in your application
-
Create a
QListViewinstance. -
Create a model to support it. In this example we use
QStandardItemModel, a class provided by the Qt framework, but it is quite possible (and fairly common) to make your own custom model by subclassingQAbstractItemModelorQAbstractListModel. In the example we populate the model by adding all entries from the user’s home directory to it. -
Set the view’s model using
QListView.setModel()